Of the many tools you can use to enhance your video content, captions are at the top of the pyramid as far as delivering the message you intend to pass to your audience. Captions may deliver what video only cannot achieve.
Furthermore, they complement the video much better than anything else, so it will be like killing two birds with one stone, entertaining your audience while serving them with the information you need.
Fortunately, among the many video captioning tools in the market, one of the best happens to be CapCut, a free online video editor that will revolutionize how you present your video content. If you’ve been struggling with captioning your videos correctly, read this to the end to learn more.
How to Add Subtitles and Captions With CapCut
Adding subtitles and captions to your video on CapCut isn’t as complicated as it may sound. The tool has been designed to be easy to use, even for people who have never interacted with CapCut or any similar online video editing tool.
Here is the step-by-step guide on how to add engaging captions and subtitles to your video content.
- First, import your content to CapCut using the upload option. You can also drag a video directly from your device’s storage. Works all the same. However, you need to ensure you have an active CapCut account to do this.

- Wait for the video to transcode, then drag it to the Timeline to begin the primary editing process.
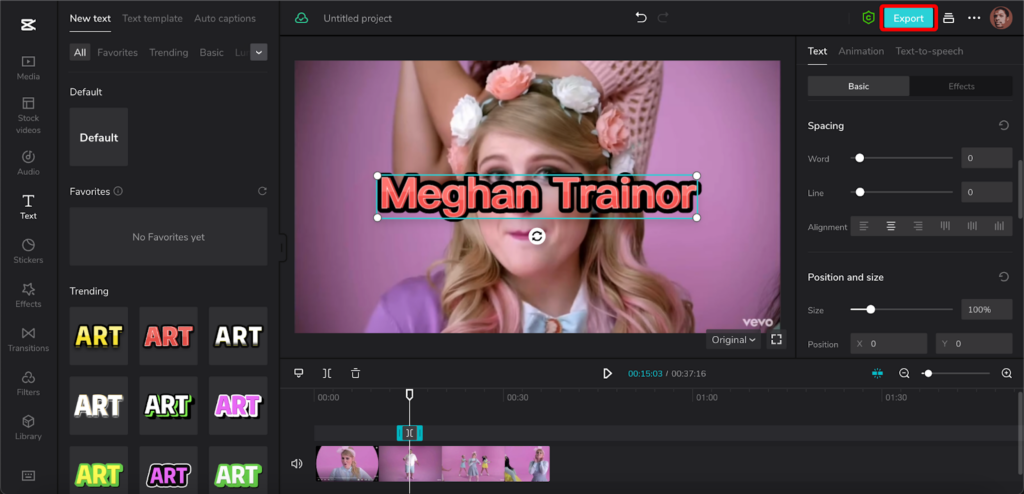
- Start creating subtitles and captions by clicking the Text icon from the left column bar. This will open a new window showcasing different fonts in varying designs and colors. Tap on the one you.

- Once you click on the font you want, it will immediately appear as an overlay on the video you want to caption.
- Double-click on the overlay to start editing the text. This allows you to type in any text you want, with the final outlay reflecting as you type in. This gives you a preview of how the final export will look like. Alternatively, you can type the text into the Text Box to the far right.

- If you want to move the text to another section of the video, simply go to the timeline, tap and hold on to the little box above the video and drag it to any part you want.
- You can change the font style, size, spacing, shadows, and other effects to enhance it and make it stand out.
- Once satisfied with the results, tap on Export, save your video on your device, and upload it to any social media site you want.
Benefits of Adding Captions and Subtitles with CapCut
Good video content will always bring in the engagement you’re looking for, but adding captions will transform how people interact with your content. Some benefits of using CapCut to add subtitles and captions to your videos include the following.
- It’s Fast: All it takes is importing the video, selecting the font style you want, entering the text, adding the effects you need to enhance it, positioning the text, and finally exporting it. This process can only take minutes, and you’ll have the video ready.
- It’s Easy: You don’t have to be an expert video editor since most functions are ready-made. There’s no need to start creating effects from scratch; you simply choose what you want from a vast library of fonts and effects.
- Enhances the Video: Captions are more direct and easy to understand. People are likely to spend more time on a video with subtitles than other video types. Furthermore, if you want to reach audiences in other countries, using subtitles is a faster way for your content to be understood.
- Massive Library of Fonts: You don’t have to worry about your captions not standing out or getting lost in the background of the video. There are countless font styles, each with different colors and limitless customization options.
- Works on Multiple Devices: You’re not limited to editing captions and subtitles to PCs like other heavy premium tools. You can do this on any device as long as it has native support for CapCut. This includes Android, iOS, macOS, and Windows.
- 4K Export: Yes, you heard it right, you can export your finished video in up to 4K quality and that’s an underrated feature. At the same time, if you need a smaller video with lower resolution for easy upload, then you can choose export options starting from 360p, all the way to 4K, including recommended resolution for TikTok videos.
- Direct Upload: Once the export is ready, you can either download the file directly to your device then upload it to your intended social media platform. Alternatively, CapCut allows users to upload to platforms like TikTok directly from within CapCut, saving you time in the process.
Despite the amazing captioning features provided by CapCut, I experienced some minor hiccups. For example, I noticed some fonts were locked and couldn’t be used. I’m not sure if that means they need payment or whether there are some requirements that a user must meet first to unlock them.
Some fonts also took a long time to load. But neither of these will impact the excellent functioning of this tool. The available fonts are more than enough and they come in varying designs that can meet all your needs.
Caption Your Videos Right
Whether you’re looking for a video background remover or a tool to add captions to your videos, CapCut covers all the areas. It’s easy to use, has all the resources you need, doesn’t need to pay for anything other than simply creating an account, and most importantly, it enhances your videos to levels you’ve never seen before.